Truck Cab Removal and Test Fitting QA1 Suspension Kit
With the stock leaf springs, Twin I Beam suspension and all mounting brackets removed from the frame, we're ready to test fit the QA1 Suspension Kit. The kit is complete with all mounting hardware and detailed directions.
Stock suspension and mounting brackets have been removed from the frame and the installation of the QA1 Kit can begin. Installation measurements are taken from existing holes in the frame to insure correct mounting of new components. Templates are provided that line up with existing holes for marking the frame where cutting is needed.
Following the markings from the template we used an angle grinder to remove the marked section of the frame to allow the mounting of the notch bracket.
With the cutout complete, the QA1 notch bracket can be mounted to the frame.
The notch bracket is in place and the installation continues...
Trailing arms and coil overs now fit to the notch bracket.
Torque arm forward bracket being set into position.
Rear installation complete and ready for wheels and tires.
QA1 front suspension pieces laid out and ready to be bolted in.
New cross member installed and control wait for installation.
Completed front suspension installed.
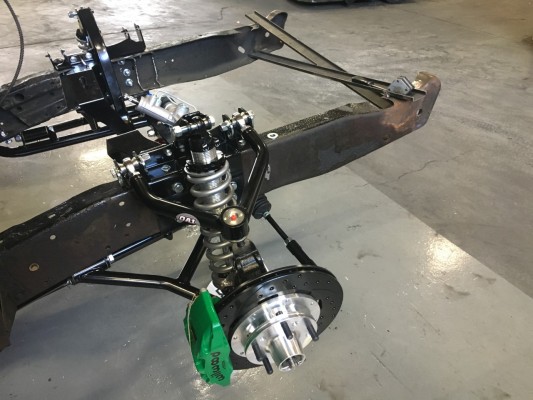
Wilwood six piston disc brakes were added to all four corners.
Most '66 F100's came from the factory with Ford nine inch rears. Ours came with a Dana 44 rear. QA1's kit bolts to the more common nine inch. We had a nine inch from a Bronco for initial fitting and found it was to wide and spring mount locations were incorrect. We called our friends at Quick Performance for help and were provided with a complete custom rear ready for installation.
Finally the cab is removed from the frame.
Front suspension and brakes installed.
Rear suspension, rear axle and brakes installed.
Front and rear QA1 Suspension Kit has been completely test fit to frame.
