

The 3 Step POR-15 Stop Rust System
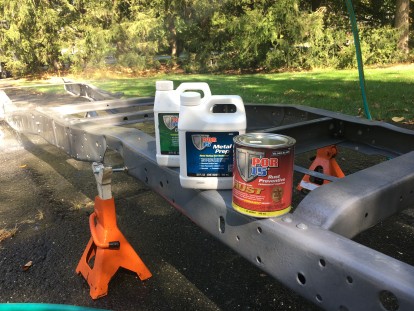
Our media blasted frame is ready for the POR-15 3 Step System to be applied.

Bare blasted frame.

We will be using our Cleaner Degreaser, Metal Prep and POR-15 Rust Preventive Coating.

Step One, Cleaner Degreaser.

Mix 50-50 with water and apply to frame and lightly scrub and rinse with water to remove any surface contamination.

Step Two, Metal Prep.

Apply to a dry surface and keep wet for twenty minutes then rinse with water.

As the surface dries it will lightly flash rust and a light coating or white powder may be on the dry surface. This is the perfect surface for our POR-15 Rust Preventive Coating to be applied to.

We moved to frame to a spray booth for Step Three. The application of POR-15 Rust Preventive Coating. We added POR-15 Dry Time Accelerator to the POR-15 Rust Preventive Coating which normally cuts the dry time in half.

Using an HVLP gun at 30 - 35 lbs with a 1.8 tip the POR-15 Rust Preventive Coating sprays well.

POR-15 Rust Preventive Coating is applied directly over the flash rusted surface.


After moving the frame back to our shop we noticed areas that were lightly coated or missed and we decided to apply an additional coat of POR-15 Rust Preventive Coating to the frame. The spray booth was busy so using a maroon pad we lightly scuffed the dry POR-15 Rust Preventive Coating and brushed on an additional coat with POR-15 Dry Time Accelerator added.

POR-15 Rust Preventive Coating is a self leveling coating and even after applying with a brush the coating looks like it was sprayed. It shows no brush marks.

All done and ready for reassembly.